Call
Call  Email
Email 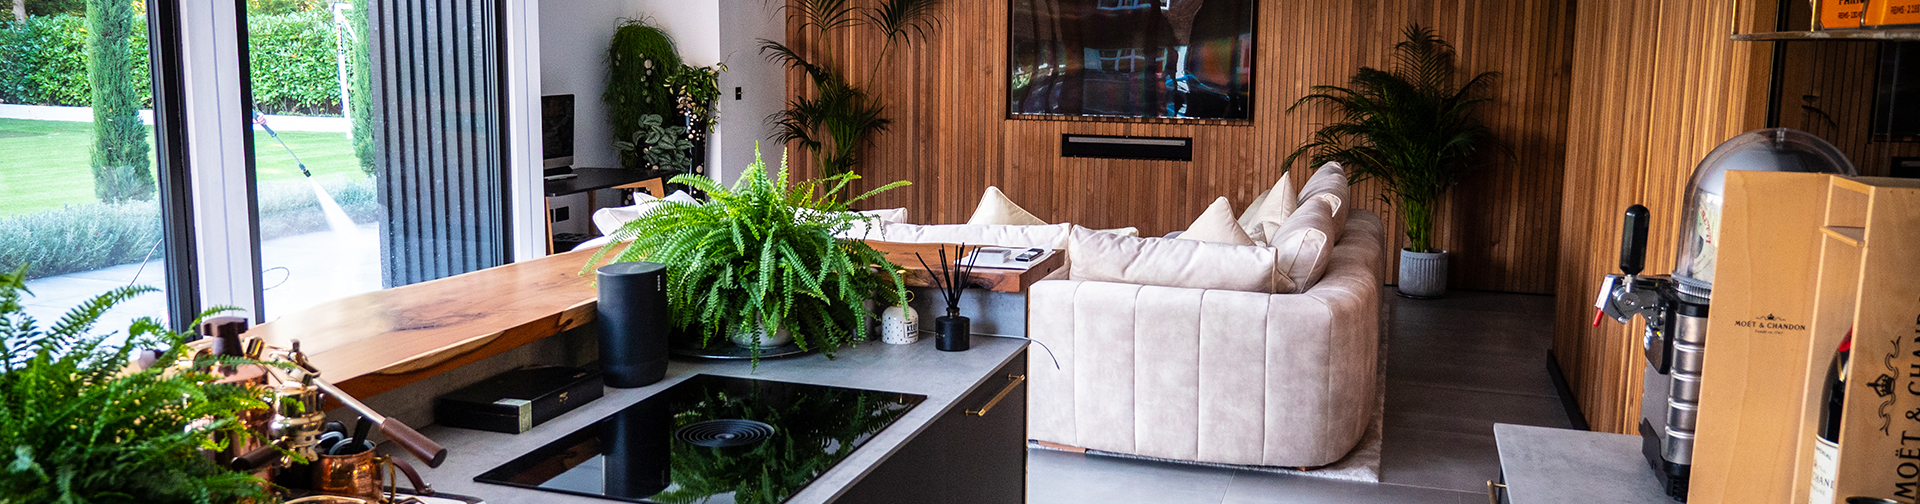
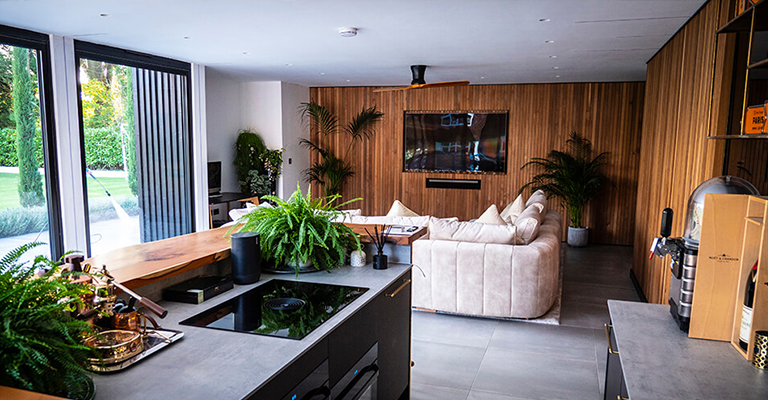

Building a garden room has become the go-to addition for the back garden. This is for a variety of reasons but the main one is for more space without having to build an extension onto your house. Having a garden room is not the same as having a shed as you can run electricity and internet out to it, so it is an excellent place to turn into an office, a bar, or an entertaining space.
1. Prepare the Space
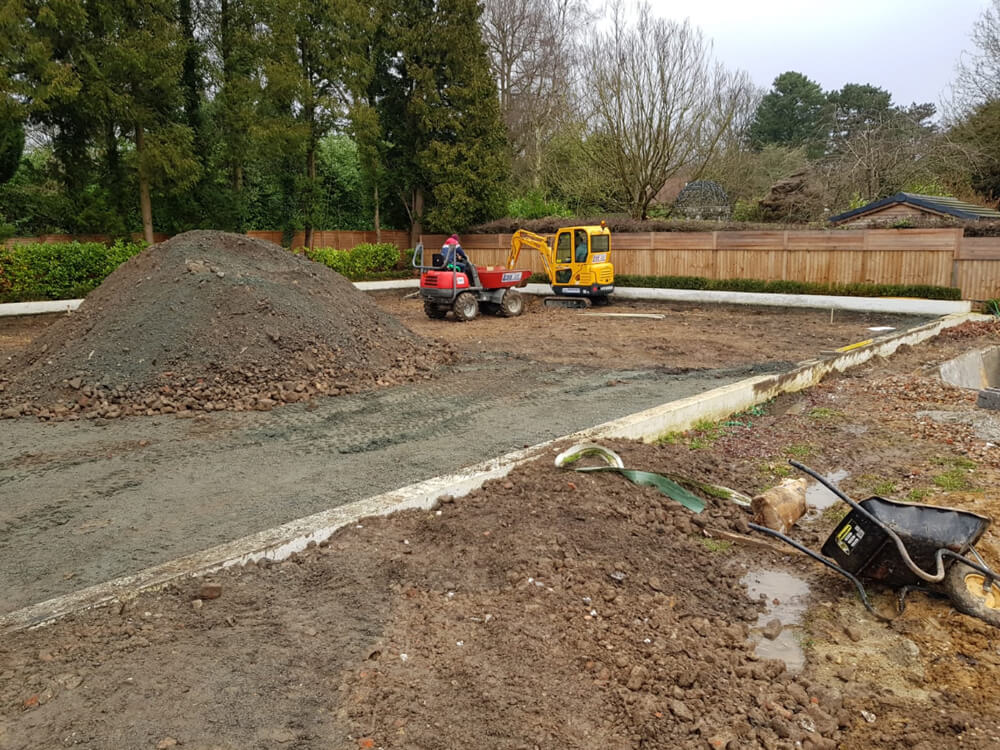
The area that will be turned into a room will need to be cleared of any trees or plants. This is also your chance to measure it out to make sure your dream garden room will fit. If you clear the space and realise that you have more room than you anticipated, you can go back to the drawing board and adjust the size of the room if you want to. Once you have the ground cleared, you need to build a small foundation. You do not need to dig down and fill the ground with concrete because this is classed as a temporary structure. A foundation of compacted sand that is enclosed in a wooden frame is enough to create a stable base to build the rest of the room on.
2. Add a Floor

The floor at this stage will be nothing more than some wooden beams that will form the base of the frame. At this stage, you do not need to worry about the tiles or wooden floor going down. All you need to do is ensure that the base is level and has enough beams to take a floor. You will also need to ensure that the timber is treated to prevent rot and damp getting up through the bottom of the room.
3. Build the Frame
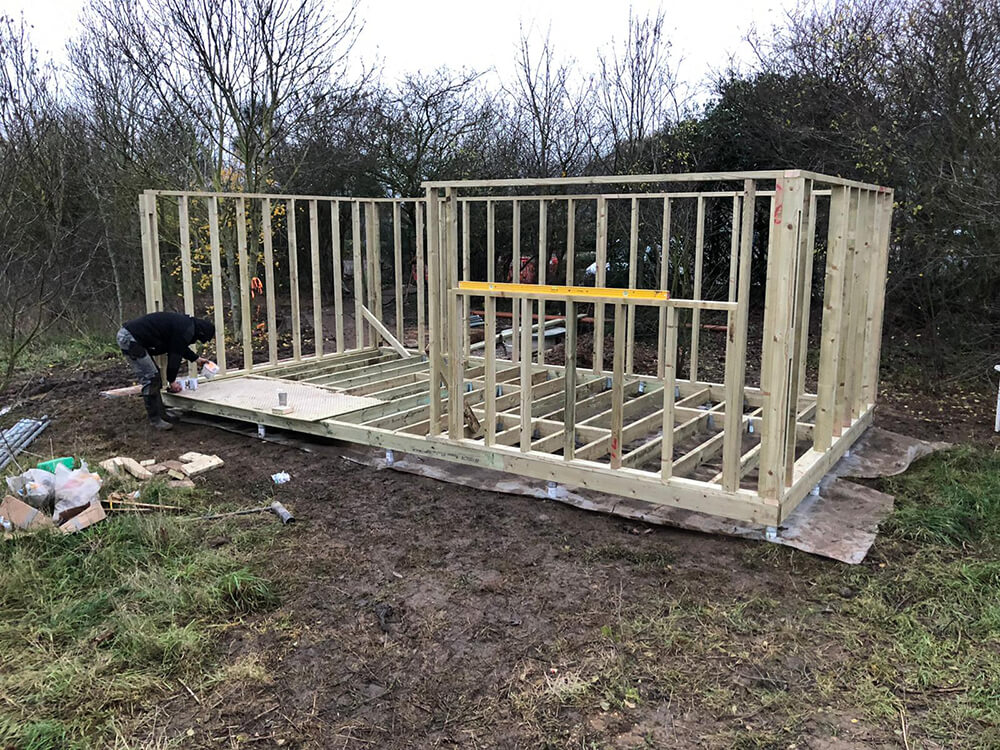
The frame of your room should line up with the frame of your floor and be big enough to hold some doors. This is where precision measuring comes into play as you will need to ensure that you have correctly cut everything. There is a saying that joiners use, “measure twice, cut once”, and this is definitely true at this stage. If you have planned to put windows in, make sure that the beams of the frame do not interfere with them. This also needs to be treated so that there is no chance of rot or damp getting into the timber.
4. Fix the Doors
The doors of your room can be as big or small as you want but they must fit inside the frame of the room. Hanging doors can be one of the hardest things to do. If you watch an experienced joiner throwing doors onto a project, it can make it seem very easy. However, there is a knack to hanging doors. If you don’t hang them properly, they can stick, they won’t latch properly, or they can sag. If you feel that you can install them yourself, then you can add the doors of your choice at this stage. When it comes to garden room doors, there are plenty of styles to choose from. You could choose a more traditional style and add french patio doors. Or you could add a sliding door to maximise space.
5. Clad the Frame
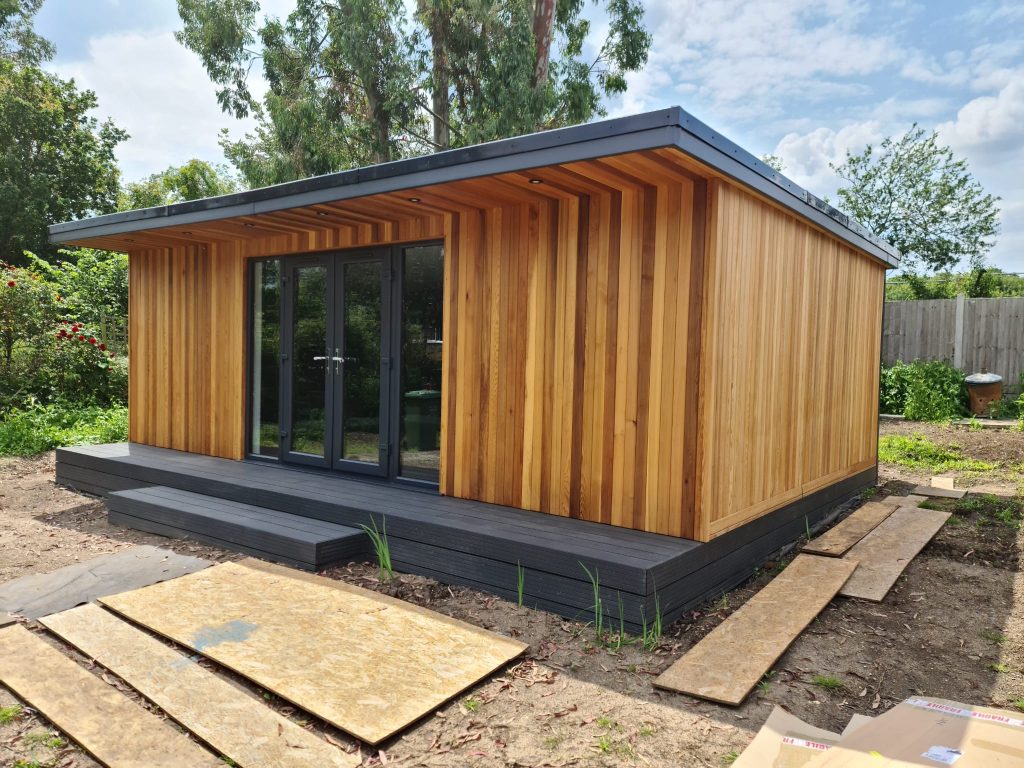
This is the part where your individuality gets to shine through. Cladding the frame of your room can be done with any number of products including wood and metal. Just remember to clad the back of the room as it needs to be waterproofed the whole way. One of the most popular choices is cedar wood. This timber has a natural ability to protect itself from fungal attacks and is maintenance free for the first 25 years after it has been installed. If you are on a budget, uPVC is one of the cheapest options that is available.
6. Add the Roof
The roof of your room is important to get right the first time because if there is a leak, it can be impossible to fully fix. If this is not fitted correctly, there is a good chance you will have to remove it and start again. Unfortunately, many people don’t realise that there is an issue until the roof is leaking water and equipment has been destroyed. When fitting your roof, you will need to ensure that the roof is not level and that the rain water can run off it. This is achieved by angling the plywood sheets to ensure they are not completely flat. Once you are happy with the angle, you cover it with a waterproofing layer to finish it off. If you have time, you can even add some little gutters to help take the rain away.
7. Mind the Step
Depending on the height of the room from the ground, you might want to add a step to the front. This is entirely dependent on the height of your foundation. If you want, you can skip this stage for now and see how you like having no step. If you discover that the lack of step is too much, you can always add a step in later. Steps can be made of many different materials but many people choose a simple decking step to help blend in with the cladding and the garden. You can also add a handrail to help you get in and out instead of a step or with the step.
8. Insulation
If you want to use your room in the winter, you will need to add some insulation to help keep the heat inside. As you have open walls at this point, it is simple to add some mineral wool rolls to the frame and under the roof. If you are not planning on using the room all year round, you can skip this step. However, you should be mindful of the fact that your plan for the room may change, so you might want to add insulation anyway. This means that you won’t have to add it in at a later date. There are many different options for insulating a garden room, and most of them require cutting up some foam to make it fit in between the beams.
9. Wires and Cables
If you want to use your garden room as an office, you will need electricity, internet, and heating available in the room. The heating part can be as simple as adding a small heater to the room such as a portable radiator. Running electricity and the internet cables can be something else as these need to be extended from your house. When it comes to the internet, you could use the hotspot from your mobile phone rather than running cables outside. Having electricity in the room is a different matter. When it comes to electricity, you should get a professional to come and fit out. Not only will you be secure in the knowledge that it has been fitted properly, but an electrician can ensure that the electrics are waterproofed in case the roof does ever leak.
10. Floors and Walls
The floors and walls are the final steps to creating a finished room. This is the point of the project where everything gets sealed up and the room can finally be used. Adding a floor can be as simple as laying some large floor boards to lay laminate flooring on top. Or, you can lay a wooden floor to blend in with the outside of the room. The walls are a different matter as you can place plaster board for a sleek finish, or you can add the same cladding that is on the outside on the inside too. This is also a great chance to add any hooks to the walls to hang furniture or electronics from. But, don’t forget to clad the rooftop. The idea at this stage is to create a seamless space that looks like it could be in your house, and that won’t be achieved with an open ceiling.
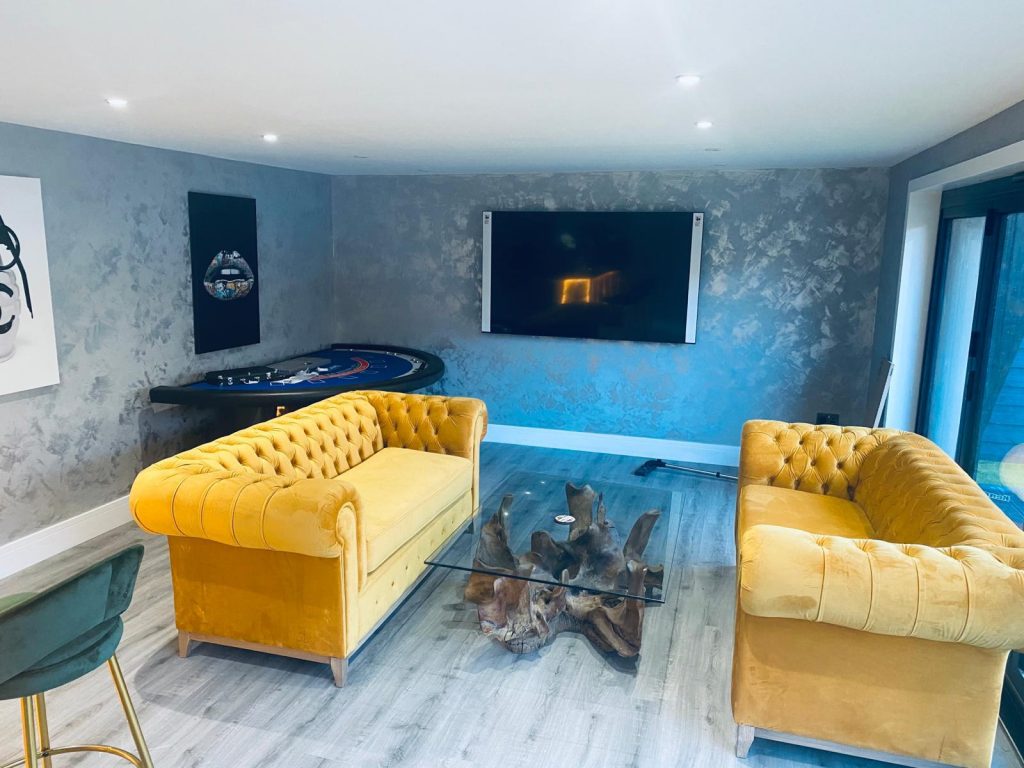
11. Decorating
Now that your room is constructed, all you need to do is add your personal touch by decorating it and filling it with the furniture that you want. This is the point that you can define the use of the garden room. Will it be an office? Or will it be a place to watch football? If you have added folding doors, you should find it easy to put some furniture inside without having to worry about twisting it through the door. If you are using it as an office, make sure you have access to your plug sockets and have room for your filing cabinets.
As you can see, there are many steps to creating a functioning garden room. If you do it right, you will get years of use and joy from the space. However, if you think that this is a big project that requires professional help, Contact GR365 for high quality garden rooms for more information on how we can add an extra room to your home.